Caluser2000
Banned
As per the title. I generally stay clear of any mobo with Dallas RTC brick type batteries but over the years aquire a couple of Socket 7 mobos over the last 30 years or so. One had a removable one the other was soldered to the modo. I had a few spares in case I decided to do the mod and around five or so coil cell battery holders I'd stiped off mobos practicing component removal/fitting. The process went something like this.
RTFM-For reference I used a hand down sketch that has been on the ps2mafia site for ever.
Decide what tools to use- Ozoto rotorty too with sharp tapered metel grinding bit, soldering iron along with flux, solder, wash sponge, craft knife etc..
Lengths of suitable wire, Dallas battery brick to be operated on and coin cell battery holder.
Time is your friend.
Not overthinking the process...This is very important.
As they say pictures say more than a thousand words here goes :
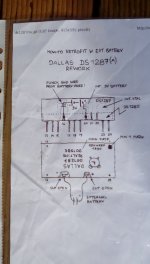
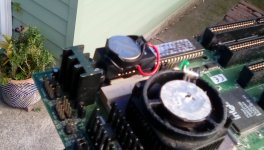
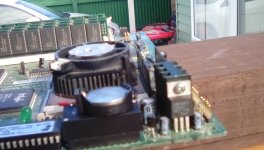
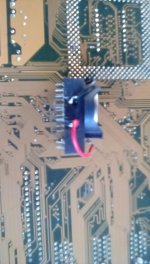
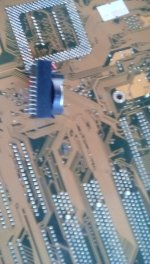
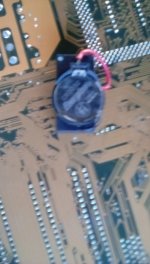
It really was a piece of piss. I elected to pull most of the plastic top cover side and potting compound therein to to expose the three center pins and the side of the circuit board the holds the battery and clock crystal. This made breaking the neg contact to the battery and soldering on the wires on to the positive contact a lot easier. I bent the two contacts horizontally on the coin cell battery holder, so they sit flat on top od the Dallas brick soldered the wires to these (extra length is for stress relief and possible repairs in future., fitted a coil cell battery that held enough charge to allow the system to hold its Bios settings when it is turned off. Secured the coin cell battery holder and battery on to the top of the Dallas brick using black silicone sealant. A little masking tape help to hold it down untill the sealant sets. I've left the side of the Dallas open but you can pot it with sillicon sealent if you need to.
The next post I make in this thread will be doing this with the Dallas brick still attached to the mobo..........
RTFM-For reference I used a hand down sketch that has been on the ps2mafia site for ever.
Decide what tools to use- Ozoto rotorty too with sharp tapered metel grinding bit, soldering iron along with flux, solder, wash sponge, craft knife etc..
Lengths of suitable wire, Dallas battery brick to be operated on and coin cell battery holder.
Time is your friend.
Not overthinking the process...This is very important.
As they say pictures say more than a thousand words here goes :


It really was a piece of piss. I elected to pull most of the plastic top cover side and potting compound therein to to expose the three center pins and the side of the circuit board the holds the battery and clock crystal. This made breaking the neg contact to the battery and soldering on the wires on to the positive contact a lot easier. I bent the two contacts horizontally on the coin cell battery holder, so they sit flat on top od the Dallas brick soldered the wires to these (extra length is for stress relief and possible repairs in future., fitted a coil cell battery that held enough charge to allow the system to hold its Bios settings when it is turned off. Secured the coin cell battery holder and battery on to the top of the Dallas brick using black silicone sealant. A little masking tape help to hold it down untill the sealant sets. I've left the side of the Dallas open but you can pot it with sillicon sealent if you need to.
The next post I make in this thread will be doing this with the Dallas brick still attached to the mobo..........
Last edited:
