Gary C
Veteran Member
As a vintage computer enthusiast and reasonably capable repairer I though I would document all the tools I use in case it is of some help to others. I intend to edit this as time goes on too, so if its a bit sparse, check back later 
First up is the scope
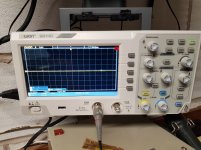
Quite a cheap one in the scheme of things but works fine for vintage machines and gets used for almost every problem. Adequate input impedance so it doesn't tend to crash machines when connected and is bright, clear and very very light. It is missing an external trigger input though, which I would definitely recommend (but you can work round it)
Essential in my view.
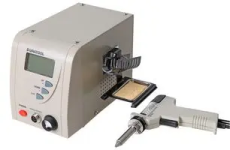
As everything is soldered unless you only have an Apple II, your going to need a soldering iron. After using cheap ones, and being asked for Christmas present ideas, I got this.
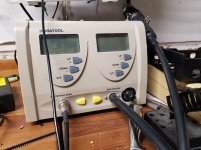
Its temperature control is accurate and comes with an SMD hot air tool, which seemed like a good idea but while I still haven't used it on an SMD, its been an excellent tool for separating keyboard membranes, stuck down facias etc. Very noisy on hot air, but had it for a couple of years now and its still working well. The iron tip is still bright and clean, but the stand I have never been able to fathom as it falls to bits at the drop of a hat. Better unit required, probably with one of those copper cleaning wools.
If your going to solder it, your going to have to suck.
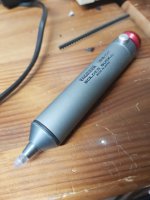
This one was actually mentioned on VCFE and came in for some criticism but I must say, the speed and which the plunger rises and the silicon nozzle means its the most effective one I have ever used, including the vacuum motor ones at work. It seems as if its designed to get up some momentum in the plunger before it really starts to suck and the result is it 'slurps' very effectively and the silicon nozzle allows a good seal around the legs. The silicone nozzle does degrade though and you need to replace it. It comes with a spare length but not sure how to get some more if it runs out. It also doesn't clear as well as others because of the flexible tube allows ejected solder to get stuck if its too long. My only other criticism is the lack of a 'gutter' for the plunger knob to rise into, the number of times I have smacked myself in the face with it is annoying. But it means I can remove a chip faster than ever before. As you can see, I have used it so much, the writing has begun to rub off. My green RS ones dont get a look in.
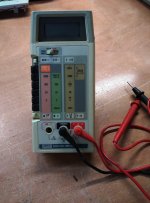
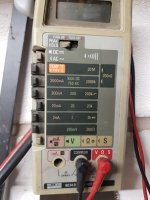
You will always need a Multimeter, so get a good second hand one. More for the toughness.
On the advice of Daver2, I got a logic tester and a RAM tester and as they are really cheap on Ebay, they are worth getting.
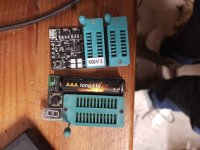
The battery operated logic tester has a dodgy power switch but it does work well and has been great for quick sense checks.
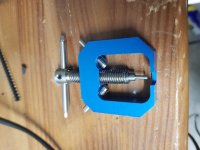
I have also overhauled quite a few 5 1/4 disk drives and ran into a problem with one of the 540 style spindle motors. One of the bearings was solid and the whole thing needed stripping, but I could not get the drive pulley off by prising it without risking damage to the pulley or the motor case.
Bought this and it just popped off. Not your average vintage computer tool, but its nicely anodised and looks great
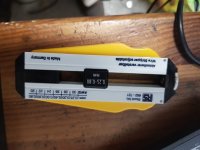
Simple and light cable stripper, works on wirewrap to 13A mains. Saves my teeth (always got toothache as a kid as I was always stripping wires with my teeth.).
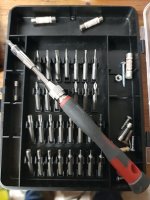
Multi head screwdriver. Essential. Has cross, straight, tork and square, makes stripping down a machine a lot less painful when you have all the sizes and shapes to hand.
These next two go hand in hand.
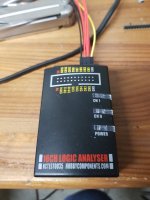
Logic analysers are generally far to expensive for hobbyist work (well for me anyway) Multichannel sampling and recording at high enough resolution requires quite a bit of horsepower, even these days. However even the really cheap ones can be useful.
This one can sample 16 channels at 12Ms/s and give enough resolution to diagnose whats going on. It works over USB so has to store the data in memory before transferring for display and at full chat can only sample for about 5 seconds, but its enough. Was vital in developing my PET IEEE disk drive emulator.
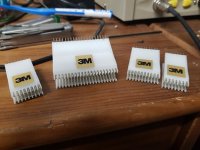
BUT, the probes it came with were useless, fiddly and kept on breaking. I managed to lay my hands on a set of 3M test clips from Ebay and some jumper wires and this has made it very capable little box. When trying to figure out why I could not page out the EPROM in my Osborne, this little box could scan the inputs and outputs of three chips simultaneously allowing me to see it was the fault of my program after all.
Those test clips though, seen them on Ebay for crazy prices ! If you see them cheap, get them.
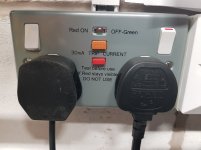
and my most important test tool of all I cant add a picture of because of the 10 photo limit, but its a RCD for the bench supply distribution block. Too many times I have plugged in some old computer and tripped the mains to the house to mass anger and recrimination. This little unit saves the headaches.
First up is the scope

Quite a cheap one in the scheme of things but works fine for vintage machines and gets used for almost every problem. Adequate input impedance so it doesn't tend to crash machines when connected and is bright, clear and very very light. It is missing an external trigger input though, which I would definitely recommend (but you can work round it)
Essential in my view.
As everything is soldered unless you only have an Apple II, your going to need a soldering iron. After using cheap ones, and being asked for Christmas present ideas, I got this.

Its temperature control is accurate and comes with an SMD hot air tool, which seemed like a good idea but while I still haven't used it on an SMD, its been an excellent tool for separating keyboard membranes, stuck down facias etc. Very noisy on hot air, but had it for a couple of years now and its still working well. The iron tip is still bright and clean, but the stand I have never been able to fathom as it falls to bits at the drop of a hat. Better unit required, probably with one of those copper cleaning wools.
If your going to solder it, your going to have to suck.

This one was actually mentioned on VCFE and came in for some criticism but I must say, the speed and which the plunger rises and the silicon nozzle means its the most effective one I have ever used, including the vacuum motor ones at work. It seems as if its designed to get up some momentum in the plunger before it really starts to suck and the result is it 'slurps' very effectively and the silicon nozzle allows a good seal around the legs. The silicone nozzle does degrade though and you need to replace it. It comes with a spare length but not sure how to get some more if it runs out. It also doesn't clear as well as others because of the flexible tube allows ejected solder to get stuck if its too long. My only other criticism is the lack of a 'gutter' for the plunger knob to rise into, the number of times I have smacked myself in the face with it is annoying. But it means I can remove a chip faster than ever before. As you can see, I have used it so much, the writing has begun to rub off. My green RS ones dont get a look in.
You will always need a Multimeter, so get a good second hand one. More for the toughness.

On the advice of Daver2, I got a logic tester and a RAM tester and as they are really cheap on Ebay, they are worth getting.

The battery operated logic tester has a dodgy power switch but it does work well and has been great for quick sense checks.
I have also overhauled quite a few 5 1/4 disk drives and ran into a problem with one of the 540 style spindle motors. One of the bearings was solid and the whole thing needed stripping, but I could not get the drive pulley off by prising it without risking damage to the pulley or the motor case.
Bought this and it just popped off. Not your average vintage computer tool, but its nicely anodised and looks great

Simple and light cable stripper, works on wirewrap to 13A mains. Saves my teeth (always got toothache as a kid as I was always stripping wires with my teeth.).
Multi head screwdriver. Essential. Has cross, straight, tork and square, makes stripping down a machine a lot less painful when you have all the sizes and shapes to hand.


These next two go hand in hand.
Logic analysers are generally far to expensive for hobbyist work (well for me anyway) Multichannel sampling and recording at high enough resolution requires quite a bit of horsepower, even these days. However even the really cheap ones can be useful.
This one can sample 16 channels at 12Ms/s and give enough resolution to diagnose whats going on. It works over USB so has to store the data in memory before transferring for display and at full chat can only sample for about 5 seconds, but its enough. Was vital in developing my PET IEEE disk drive emulator.
BUT, the probes it came with were useless, fiddly and kept on breaking. I managed to lay my hands on a set of 3M test clips from Ebay and some jumper wires and this has made it very capable little box. When trying to figure out why I could not page out the EPROM in my Osborne, this little box could scan the inputs and outputs of three chips simultaneously allowing me to see it was the fault of my program after all.
Those test clips though, seen them on Ebay for crazy prices ! If you see them cheap, get them.


and my most important test tool of all I cant add a picture of because of the 10 photo limit, but its a RCD for the bench supply distribution block. Too many times I have plugged in some old computer and tripped the mains to the house to mass anger and recrimination. This little unit saves the headaches.
Last edited:

