• Please review our updated Terms and Rules here

I made an Atari joystick tester!

NathanAllan

Veteran Member
Joined
Jun 1, 2003
Messages
2,437
Location
Bellevue, Colorado
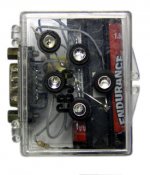
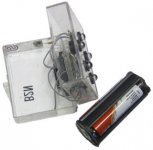
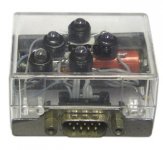
It was a sure fun project, and taught me more about soldering. Everyone needs to build themselves one of these. Here's a link to pics (click forward)

http://picasaweb.google.com/nathan.dkassandra4/UntitledAlbum#5291713917658822146

and I also made a youtube video of it in action. The next time I make one, it will be usable with the paddles and if I can swing it, have a vibrate function.

http://www.youtube.com/watch?v=7zQkX3JbRTM&feature=channel_page

This stuff is fun. A bit of work to get there, but electronics can be my friend any day!

Nathan
 
Ok... you're right - "Everyone needs to build themselves on of these." I have several joysticks laying around, and rather than spend a few minutes hooking up an Atari just to test them, I spent a couple of hours building this instead! Go figure... ;)

Any way, I thought I'd share my design. I used hi-intensity blue for the direction indicators and a hi-intensity red for the fire button. The battery pack is a removable three cell AAA pack out of one of those LED flashlights.

By the way - I learned that metal duct work tape makes fantastic battery contacts. Since the battery pack was such a perfect fit in the case, I was able to stick a piece of the tape on each side for the pack to touch. Just make sure you solder the wire to the tape first. And make sure you scrape the tape before you solder. It takes a while for the solder to stick, but eventually it will. Handy little tip...

Any way, all of the joysticks need to be rebuilt... now I know!
 

Attachments

  • joytest1w.jpg
    joytest1w.jpg
    42 KB · Views: 1
  • joytest2w.jpg
    joytest2w.jpg
    34.7 KB · Views: 1
  • joytest3w.jpg
    joytest3w.jpg
    39.2 KB · Views: 1
rebel,

yours is much more compact than mine, that's for sure. And you hit on a point about the tape (the scraping part I will remember) as the metal tin I used serves as a common negative for all the LEDs. Since I used a 9-volt I had to use resistors on all the positive leads to the LEDs. Plus side is that the battery will last for a long time.

While walking around flea markets and thrift stores, it comes in handy. Plus it's a great lesson in soldering (though largely impractical as far as home testing, agreed).

My next design I am wanting to include a small motor for vibration whenever a button is pressed or the joystick is moved.
 
Ahh, that's no fun! Besides, with a name like Tinkerer, I'm sure you could come up with something a little more creative than that! ;)

I know! Frankly, it never crossed my mind to build a tester, but I can easily see the benefits of having one. This will definately have to be a project for the (near) future. Lately I've been having way too much fun playing with an IBM 350 that was "donated" some time back. The HDD was shot, but I happened to have a replacement in the stash. The thing boots to Windows 95 in about 30 seconds and after using a Vista machine that's WOW fast. :D
 
Last edited:
I received my tester from Nathan this week and love it. In fact, used for the first time today at the So Cal swap meets. Yep, worked like a charm.

Here is mine, customized with the ChaseTheChuckwagon.com logo:

jstester.jpg
 
Back
Top