NeXT
Veteran Member
One of my finds while rummaging through San Jose's Capitol Flea Market was a Power Panner.
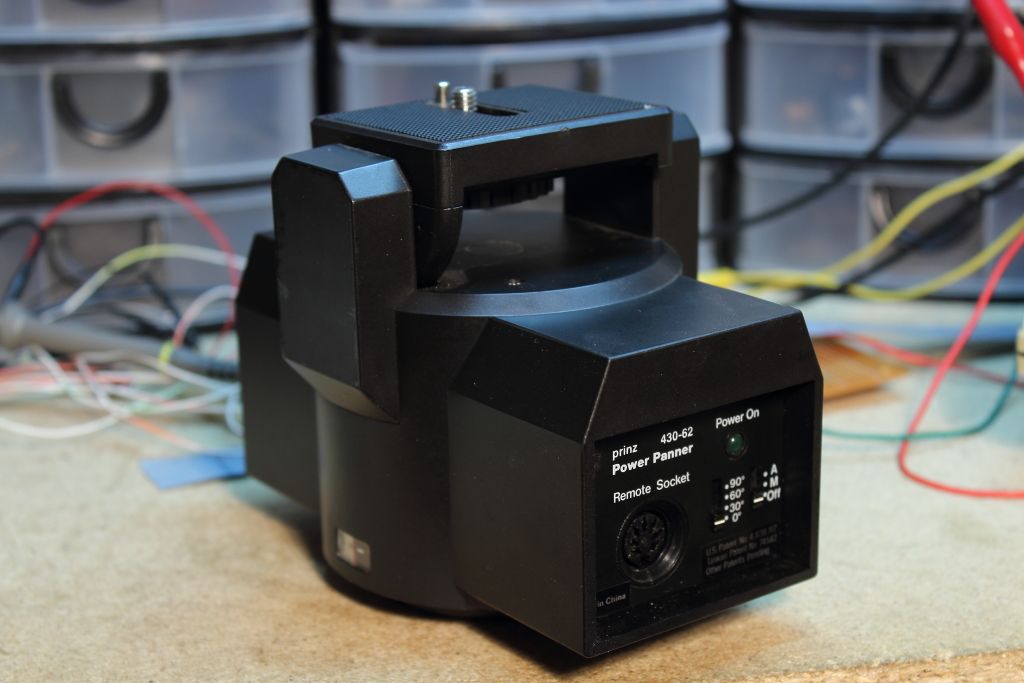
You fed it either 6V from a wallwart or four AA batteries, you put it between your tripod and your camera and you could pan and tilt without having to be constantly adjusting your tripod which for panoramas can cost precious pixels when the image shifts or the tripod shifts if you are setup on a slope.
It was a pretty good deal for $5. Unfortunately what I didn't get was the remote control.

Okay, so it's nothing special, just a D-pad and a speed control. It hooks into a DIN-7 jack on the unit. I'm assuming that someone has already reverse engineered the pinout and made it public.
Nope. On my own. :/
Thankfully the simplicity of the remote meant that reverse engineering it was extremely easy:
My money is on 6 and 7 being the speed control however at the time of this blog I decided against a speed control as without it attached the unit defaults to fast mode, which is still pretty slow.
Anyways, I also didn't want to be arsed to find what resistance the speed control had to be. Finding a controller became the fun part. I could either build one or I could salvage one from one of my many game controllers. First thing that came to mind was the NES pad however I decided against it both because it's used in a lot of hacks and I would never have a use for the SELECT and START buttons (and I also couldn't afford to carve one up right now).
On the other hand, the controller for the Sega Master didn't have those and by chance I had one controller handy.
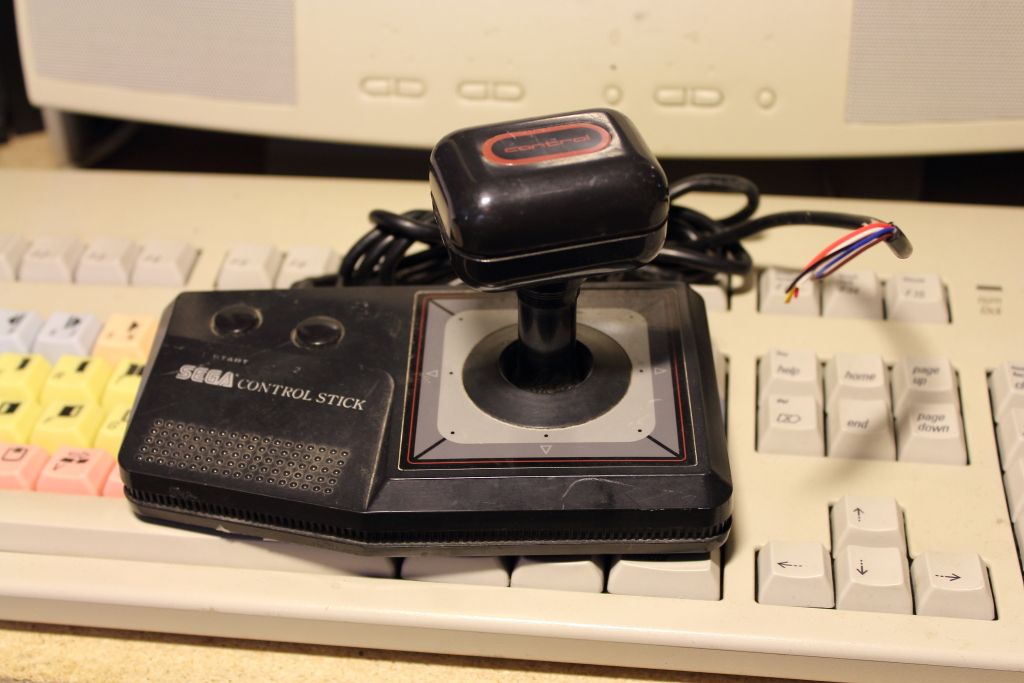
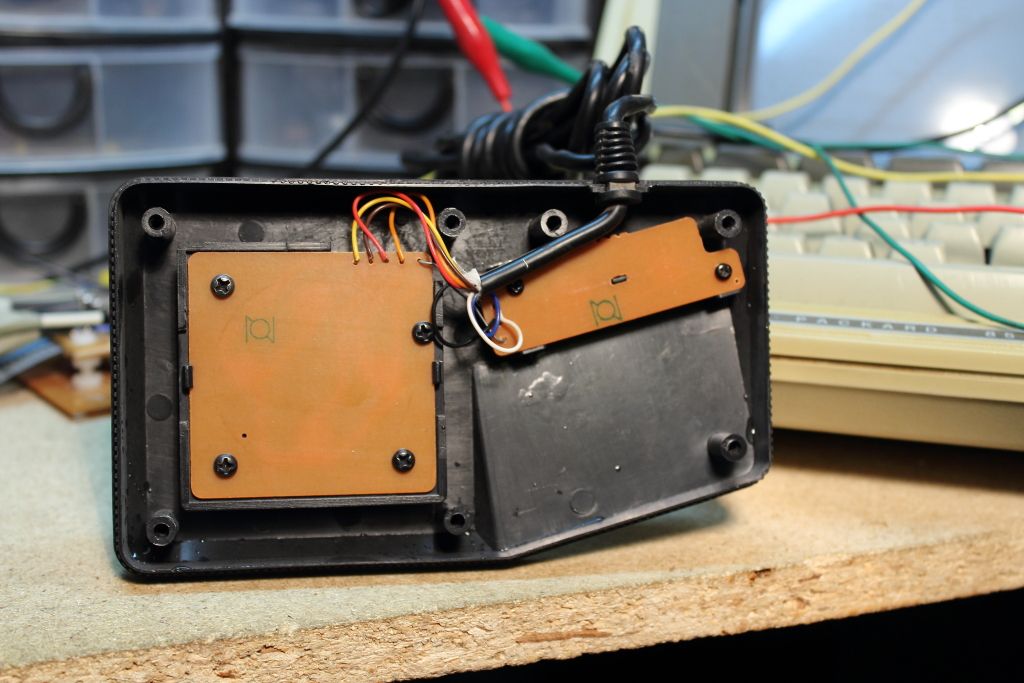
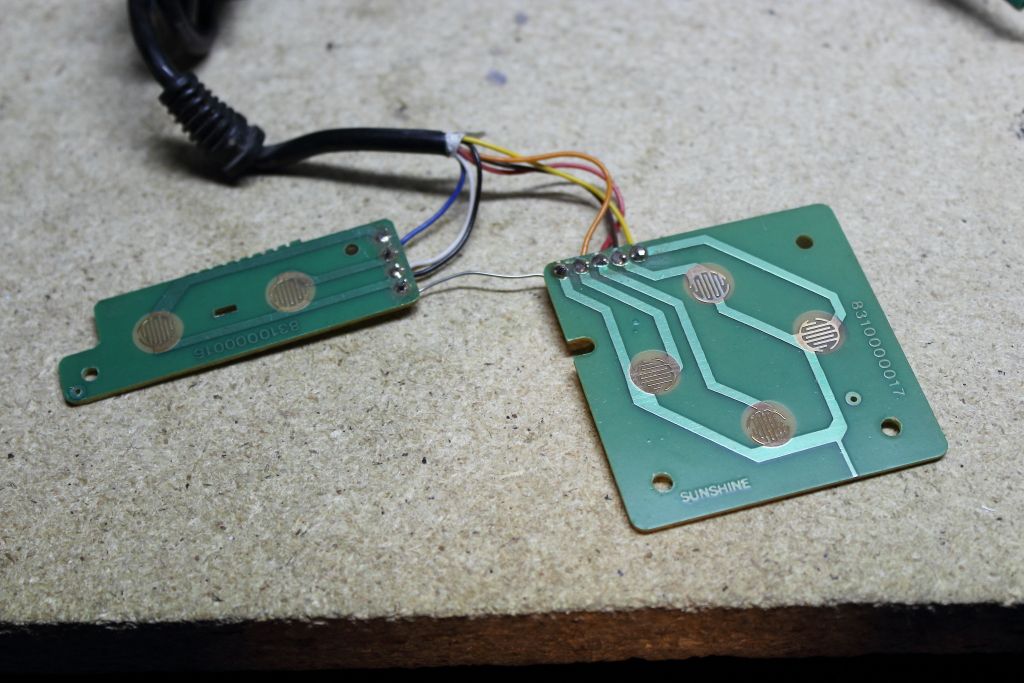
This was once part of another project that ultimately never took off. Now I could use it. The joystick would control the pan and tilt while the 1 and 2 buttons could feed into my T3i and control focus and shutter. To ensure that the controller would work I tore it apart, gave it a cleaning and made sure it was going to be a no BS ordeal for the hack.
It WOULD work but there was one hitch. The signal ground would have to be shared between the camera and the pan and tilt. This was a problem because signalling for the motor was 6v and I had no clue if this 6v feeding back into the camera would cause problems.
I decided to risk it and go ahead anyways. So long as the damage was not apparent at the store I could still validate my warranty, right? Right??
Anyways, the cables are color coded, for convenience it breaks down to this:
Don't know how well Sega kept to color schemes so I recommend if you want to try this you double check my pinout first.
So my next problem was that locally at least you can't find DIN-7 connectors. Only DIN-6 and DIN-8.
Solution: break off the excess pin.

Finally the fun part: Soldering.
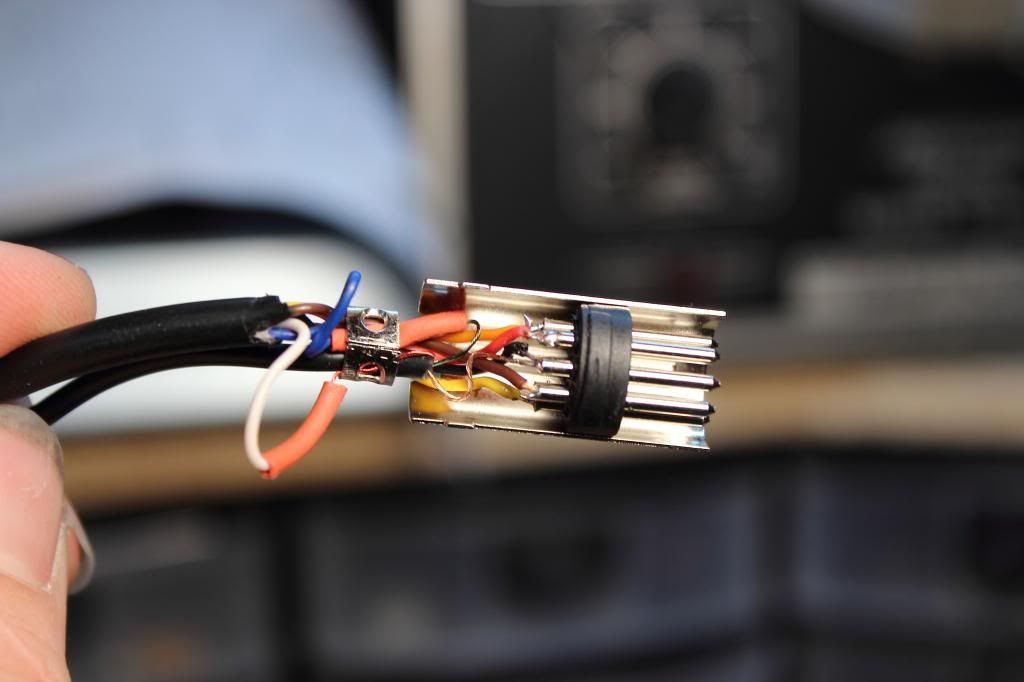
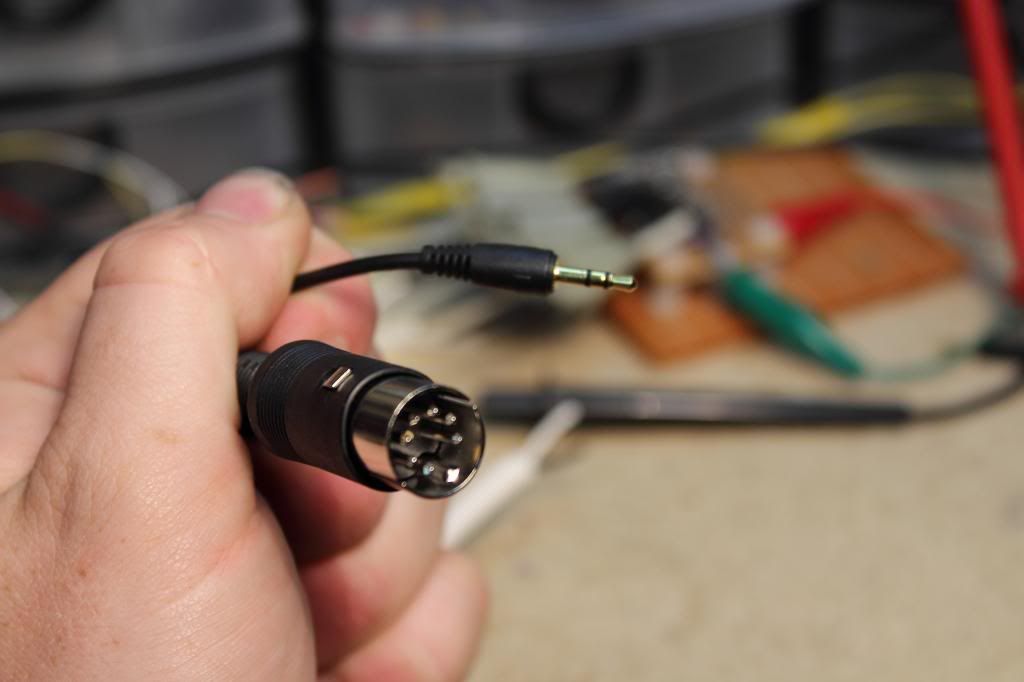
For my camera control I purchased a short stereo cable with 2.5mm jacks on either end. That way I could cut the cable in half, strip the leads (which in this case are that AWFUL laminated wire crap that's a bitch to tin) and shove that into the pins for soldering. I used shrink tube to protect the area where I had stripped off the lamination to avoid shorts. I then also bundled it with the game pad cable when I crimped the strain relief.
The finished cables:
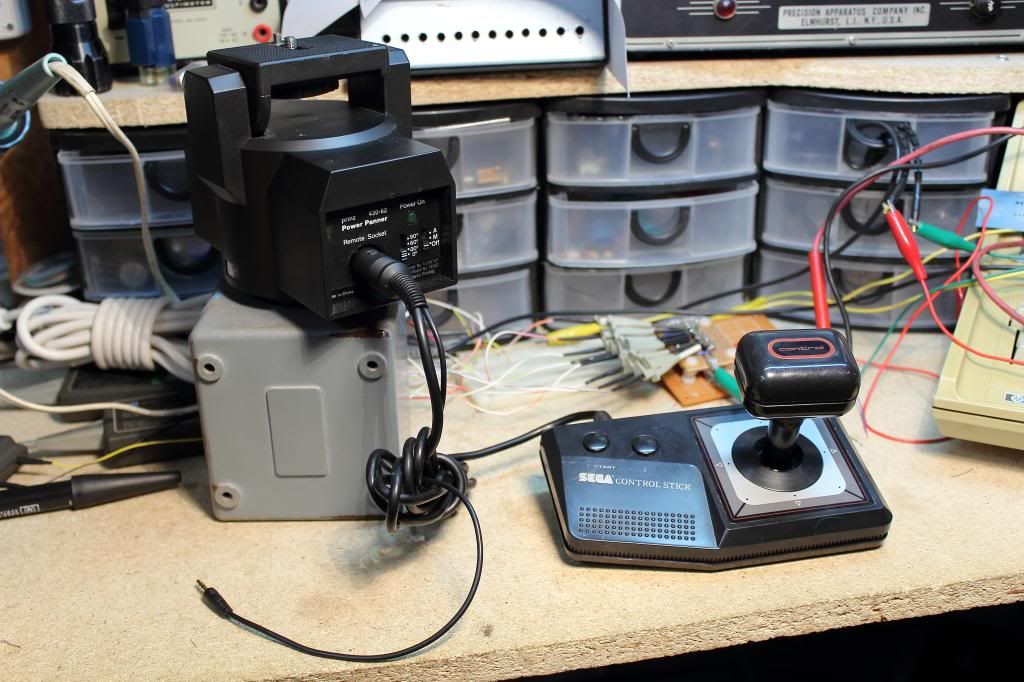
The finished controller with the Power Panner.
Did it work: Yes it did. I'm not seeing any issues with the shared ground. I am however finding a problem with the controller being a bit bulky. Perhaps the more conventional Sega Master pad is a bit better suited for this. I might have to stuff a piece of steel or something in the case to make it feel heavier.
You fed it either 6V from a wallwart or four AA batteries, you put it between your tripod and your camera and you could pan and tilt without having to be constantly adjusting your tripod which for panoramas can cost precious pixels when the image shifts or the tripod shifts if you are setup on a slope.
It was a pretty good deal for $5. Unfortunately what I didn't get was the remote control.
Okay, so it's nothing special, just a D-pad and a speed control. It hooks into a DIN-7 jack on the unit. I'm assuming that someone has already reverse engineered the pinout and made it public.
Nope. On my own. :/
Thankfully the simplicity of the remote meant that reverse engineering it was extremely easy:
Code:
1 - Clockwise
2 - Signal Ground
3 - Counterclockwise
4 - Up
5 - Down
6 -
7 -Anyways, I also didn't want to be arsed to find what resistance the speed control had to be. Finding a controller became the fun part. I could either build one or I could salvage one from one of my many game controllers. First thing that came to mind was the NES pad however I decided against it both because it's used in a lot of hacks and I would never have a use for the SELECT and START buttons (and I also couldn't afford to carve one up right now).
On the other hand, the controller for the Sega Master didn't have those and by chance I had one controller handy.
This was once part of another project that ultimately never took off. Now I could use it. The joystick would control the pan and tilt while the 1 and 2 buttons could feed into my T3i and control focus and shutter. To ensure that the controller would work I tore it apart, gave it a cleaning and made sure it was going to be a no BS ordeal for the hack.
It WOULD work but there was one hitch. The signal ground would have to be shared between the camera and the pan and tilt. This was a problem because signalling for the motor was 6v and I had no clue if this 6v feeding back into the camera would cause problems.
I decided to risk it and go ahead anyways. So long as the damage was not apparent at the store I could still validate my warranty, right? Right??
Anyways, the cables are color coded, for convenience it breaks down to this:
Code:
ORANGE - Shutter
WHITE - Focus
RED - Down
BROWN - Up
ORANGE - Counterclockwise
YELLOW - Clockwise
BLACK - Signal GroundSo my next problem was that locally at least you can't find DIN-7 connectors. Only DIN-6 and DIN-8.
Solution: break off the excess pin.
Finally the fun part: Soldering.
For my camera control I purchased a short stereo cable with 2.5mm jacks on either end. That way I could cut the cable in half, strip the leads (which in this case are that AWFUL laminated wire crap that's a bitch to tin) and shove that into the pins for soldering. I used shrink tube to protect the area where I had stripped off the lamination to avoid shorts. I then also bundled it with the game pad cable when I crimped the strain relief.
The finished cables:
The finished controller with the Power Panner.
Did it work: Yes it did. I'm not seeing any issues with the shared ground. I am however finding a problem with the controller being a bit bulky. Perhaps the more conventional Sega Master pad is a bit better suited for this. I might have to stuff a piece of steel or something in the case to make it feel heavier.