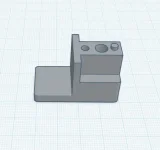
This thread will complement the Where to get Kaypro Replacement Parts thread. It will show how to make parts that aren't available or as an alternative to buying the part when you have the necessary components on hand or are able to acquire them faster or more cheaply than buying the entire part pre-built.
To start things off:
Building a Kaypro Keyboard Cable
@ldkraemer figured out how to reproduce a Kaypro II keyboard cable years ago. It should replace any Kaypro keyboard cable for similar Kaypros in their Luggable CP/M line, such as the 2, 2X, 4, and 10.
Those who want to read the original thread can find it in here:
https://forum.vcfed.org/index.php?t...detail/stewart-connector/940-SP-3044R/2257004
Quantity 1: 7 feet (2.13m) 4-Conductor Phone Wire - at least AWG28 Stranded
or
4-Conductor Flat Tele Wire - at least AWG28 Stranded
The coiled version comes in your choice of 3 colors, Black, Silver, and White with AWG26 which has been proven to work:
https://www.digikey.com/en/products/detail/assmann-wsw-components/AT-K-C-26-4-B-7/1972614
https://www.digikey.com/en/products/detail/assmann-wsw-components/AT-K-C-26-4-S-7/1972737
https://www.digikey.com/en/products/detail/assmann-wsw-components/AT-K-C-26-4-W-7/1972738
I used my OHM Meter to OHM out the Original Keyboard Cable as follows:
I oriented the RJ-22 Modular Plugs each with Brass Contacts UP, and Pin #1 is on the Left of RJ-22 Modular Plug.
J3 Pin 4 (Black) - Keyboard Serial Data Out (to Keyboard) TTL Levels...............BLACK WIRE.....
J3 Pin 3 (Red) - Ground................................................................................RED WIRE.........
J3 Pin 2 (Yellow) - Keyboard Serial Data In (from Keyboard) TTL Levels..............YELLOW WIRE..
J3 Pin 1 (Green) - +5 VDC..............................................................................GREEN WIRE....
...........................................................................................Keyboard Serial Data in (from Motherboard) TTL Levels - KB Pin 1 (Black)
...........................................................................................Ground...................................................................... - KB Pin 2 (Red)
...........................................................................................Keyboard Serial Data Out (to Motherboard) TTL Levels - KB Pin 3 (Yellow)
...........................................................................................+5 VDC..................................................................... - KB Pin 4 (Green)
Case Plug Pin 1 goes to Keyboard Plug Pin 4
Case Plug Pin 2 goes to Keyboard Plug Pin 3
Case Plug Pin 3 goes to Keyboard Plug Pin 2
Case Plug Pin 4 goes to Keyboard Plug Pin 1
This results in a cable with the wires going straight through the cable. You should be able to just crimp the connectors directly onto the cable without having to twist any of the wires before inserting the cable into the RJ-22 connector. Just be sure that the Brass contacts are UP each time and the same side of the cable is facing up on both ends.
To start things off:
Building a Kaypro Keyboard Cable
@ldkraemer figured out how to reproduce a Kaypro II keyboard cable years ago. It should replace any Kaypro keyboard cable for similar Kaypros in their Luggable CP/M line, such as the 2, 2X, 4, and 10.
Those who want to read the original thread can find it in here:
https://forum.vcfed.org/index.php?t...detail/stewart-connector/940-SP-3044R/2257004
Quantity 1: 7 feet (2.13m) 4-Conductor Phone Wire - at least AWG28 Stranded
or
4-Conductor Flat Tele Wire - at least AWG28 Stranded
The coiled version comes in your choice of 3 colors, Black, Silver, and White with AWG26 which has been proven to work:
https://www.digikey.com/en/products/detail/assmann-wsw-components/AT-K-C-26-4-B-7/1972614
https://www.digikey.com/en/products/detail/assmann-wsw-components/AT-K-C-26-4-S-7/1972737
https://www.digikey.com/en/products/detail/assmann-wsw-components/AT-K-C-26-4-W-7/1972738
If you can't get a 7 foot (2.13m) cable, you might be able to use a 5 foot (1.5m):
https://www.digikey.com/en/products/detail/assmann-wsw-components/AT-K-C-26-4-B-5/1972745
https://www.digikey.com/en/products/detail/assmann-wsw-components/AT-K-C-26-4-S-5/1972744
https://www.digikey.com/en/products/detail/assmann-wsw-components/AT-K-C-26-4-W-5/1972746
I used my OHM Meter to OHM out the Original Keyboard Cable as follows:
I oriented the RJ-22 Modular Plugs each with Brass Contacts UP, and Pin #1 is on the Left of RJ-22 Modular Plug.
J3 Pin 4 (Black) - Keyboard Serial Data Out (to Keyboard) TTL Levels...............BLACK WIRE.....
J3 Pin 3 (Red) - Ground................................................................................RED WIRE.........
J3 Pin 2 (Yellow) - Keyboard Serial Data In (from Keyboard) TTL Levels..............YELLOW WIRE..
J3 Pin 1 (Green) - +5 VDC..............................................................................GREEN WIRE....
...........................................................................................Keyboard Serial Data in (from Motherboard) TTL Levels - KB Pin 1 (Black)
...........................................................................................Ground...................................................................... - KB Pin 2 (Red)
...........................................................................................Keyboard Serial Data Out (to Motherboard) TTL Levels - KB Pin 3 (Yellow)
...........................................................................................+5 VDC..................................................................... - KB Pin 4 (Green)
Case Plug Pin 1 goes to Keyboard Plug Pin 4
Case Plug Pin 2 goes to Keyboard Plug Pin 3
Case Plug Pin 3 goes to Keyboard Plug Pin 2
Case Plug Pin 4 goes to Keyboard Plug Pin 1
This results in a cable with the wires going straight through the cable. You should be able to just crimp the connectors directly onto the cable without having to twist any of the wires before inserting the cable into the RJ-22 connector. Just be sure that the Brass contacts are UP each time and the same side of the cable is facing up on both ends.

