• Please review our updated Terms and Rules here

MAI 4101/310-01240

BlaBla1985

Experienced Member
Joined
Aug 29, 2021
Messages
174
Location
Zuid Holland, The Netherlands
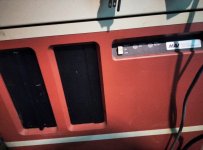
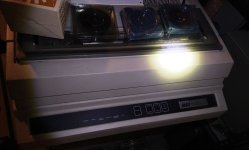
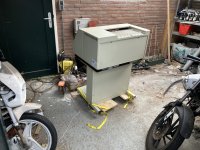
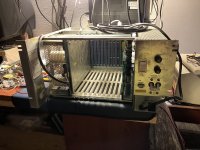
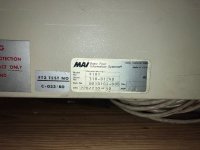
As of today I am the new owner of a 1983/84 MAI. Model nr. 4101 serial 310-01240 with a newer terminal, model 4309. And a large printer that I had to park in the garage for now.
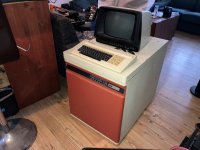
System.jpg

Sticker.jpg

I like the massive hard disk inside, I hope that is still good.
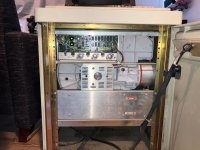
Harddisk.jpg

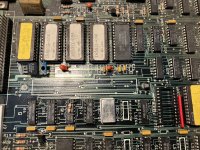
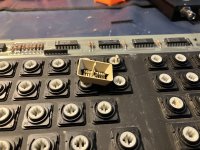
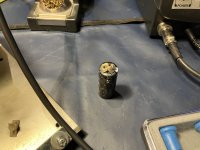
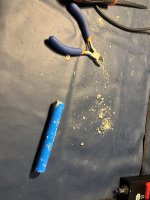
The machine itself seems to be in an ok condition, very dusty but otherwise clean inside. Condition is otherwise unknown. The terminal had a big leaking Varta in it so that was the first thing to go. From the looks of it, the damage is not severe. The ROMs don't seem to be affected by the leak, just some LS logic chips and a -5V regulator. At first glance the traces seem fine for now. Some via's are a little dull. It needs a good cleaning and maybe the affected chips need to be changed out. Do these terminals need a battery to opperate, or is it just to save some user settings so you don't need to set things up very day?
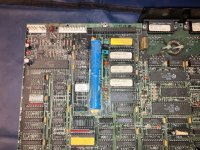
Terminalboard.jpg

Battery.jpg

I first found this machine in a telecom room in a building 5 years ago, during an electrical inspection. I asked about it back then but the owner wasn't willing to sell (it was his dads first business computer and had some sentimental value to it). Since these inspections are periodical I was there again last week, found the machine again and asked about it. After a few days I got a message that i could pick it up whenever I was in the neighbourhood. So I got my work van emptied out as much as possible and it just about fitted in there.

This is my first mini computer project, over the weekend I'd like to strip most of the cabinet and give that a good clean and store it away to the time being and focus on cleaning and cataloging the cards and PCB's. And try to do a first cleaning pass over the terminal main board to get most of the corrosion off.
 
That fixed disk looks pretty savage. Look forward to hearing how the leak repairs go!
Well, after cutting the battery off and brushing most of the battery insides away it seems it's not to bad. I don't think it has gone through the soldermask for the most part. But a few 74LS chips are in rough shape and I would be surprised if they still work.
 
I did a first pass of cleaning with some vinegar and alcohol and honestly it doesn't look to bad. There are a few traces that are a bit suspect, but it could also still be dirt. And other then the 7905 regulator the chips seem ok aswell. I haven't taken any ROMs out, and a few pins of those sockets may be a little affected by the battery leakage. But I think it's mostly fine.

Firstpass.jpg
 
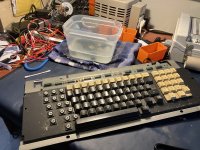
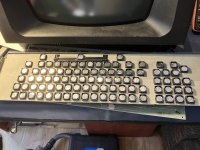
While waiting on some cleaning supplies and EDS bags for the rest of the system boards, I thought I'd tackle the keyboard today. This thing was pretty dirty and even though I don't really ever go for full restorations, this keyboard could use a bit of cleaning.
DirtyKeys.jpg
Disassambly.jpg

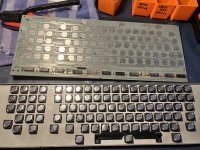
This terminal seems a little cursed though, a leaking Varta on the mainboard, and now Foam and Foil Keytronics keyboard... I ordered a set of replacement foam and foil pads as the foam is just dust at the moment.
FoamFoil.jpg

While taking the keycaps off a few of the pegs that hold the plungers broke, but I think a bit of superglue fixed it.
BrokenCaps.jpg

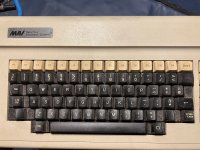
In the end, it now looks pretty clean now.
CleanKeyboard.jpg

The case still has some scratches on it, but that is fine. I'm not going for a "as new, factory fresh" look when working on old computers.
 
I was very surprised that this turned out to be a keytronic keyboard. I need to open mine up and see what it is inside. Your new MAI Basic FOUR looks very similiar to mine. Same 2 foot long belt driven hard drive too. I really need to go over mine as I didn know some of these had batteries!!!

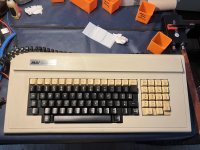
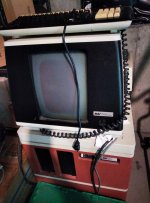
Again mine looks just like yours, same color scheme too but it has two drive bays for 8 inch floppy drives and mine has just one 8 inch bay populatated.

did yours come with the gigantic daisy wheel printer too?

I got mine from the original Owner/Company. They said they got it in 1980 or 1981


IMG_20230730_151553.jpgIMG_20230730_151607.jpgIMG_20230730_151737.jpgIMG_20230730_151705.jpg
 
Last edited:
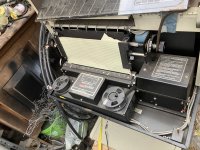
@VERAULT Yours seems to have a floppy drive, right? Is that an 8 inch drive? That could be usefull for trouble shooting if the hard disk is not working. Mine just has this massive sealed 14 inch hard disk and some flat cables that connected to tapedrives. They were no longer there and the guy I spoke to about this system was not aware of any external drives that belonged to it (but, he was a boy when this machine was used by his dads company, so he had few memories of it).

Mine is a little later, there are stamps on the door and the hard drive that say 03-84 and most IC's on the PCB's I've seen so far are from late '83.

I don't know if all terminals have batteries in them but I tend to open up everything I buy ASAP just to see if anything needs to be adressed quick (like leaking caps or something like that). I was not expecting a Varta in there...

There is a battery in the cabinet aswell, but it's a sealed lead acid cell that hasn't leaked or anything and is not in contact with any of the boards if it would leak.

I don't really know what to make of the terminal to be honest... when I noticed the ROMs stickers I thought the terminal was newer then the rest of the system as they all have 1990 - 1992 dates on the stickers. Also the Z80 CPU and SIO chips have '90's datecodes on them and the SIO (i think) is soldered to the board. But every other IC on the board has an '83 date code and the keyboard is dated '83 aswell. I can understand the ROM's being upgraded through the service life of the computer, but why update the Z80 chipset?
I'm also very curious as to what is on those ROMs, is that were the basic lives? Or is that somewhere on a card in the machine? The terminal has 6 ROM chips fitted and space for 1 more. I doubt they are all for character ROMs.
 
Looks like a Printronix P300. It is technically a dot matrix printer, but the printhead only moves back and forth 1/2 of a print wire diameter. Really high quality text and graphics output. The same printer was used by DEC, Wang, and others.
 
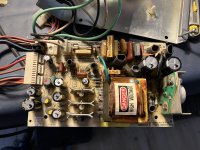
I thought I'd do something quick and easy this afternoon, I had a few hours spare after work. Just inspect and verify that the terminals PSU is in good enough order for testing.

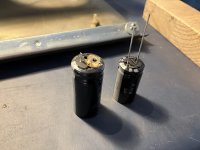
Second capacitor on the mains side of thing was at half capacitance and high ESR (in circuit about 11ohms, I was doing things quick 'n dirty...).

DeadCap.jpg

Even though both pins were desoldered, one pin had just rotted out completly. It's well and truly gone. The other cap looked better but also leaked a bit so this PSU is going to get a recap...
 
Today I pulled all the card out of the card cage and gave them a little cleaning before storing them in ESD bags for a later stage in the project.
Took some shots of the boards while they were on the bench (not great on the lighting).
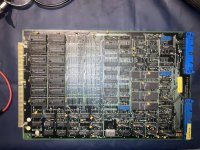
This is one of the I/O boards for the terminals, I have 2 of these. The machine should be able to have up to 3 from what I can interpret from the layout sticker inside:
I-Oboard.jpg

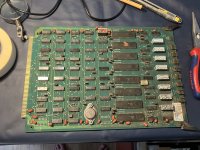
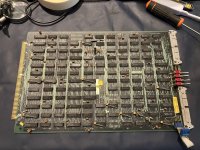
And these are the CPU boards, with the ROMs and everything. I'm not sure if I can back these ROMs up with the simple TL866II.
CPU1.jpg
CPU2.jpg

I've also done a second pass in cleaning the Terminal main board and gave the whole board a little bit of a clean while I was at it. The board looks quite nice now, and I can't really see any real damage from the battery corrosion. Just need to replace the 7905 -5V regulator as that looks bad.
I did pull the ROM's from the terminal and backed them up to see if they were still good. They seem to read back OK.

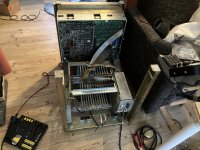
But, at the end of the day I had a mostly empty chassis, just a little hard disk and the card cage to pull out.
Mostly-empty.jpg

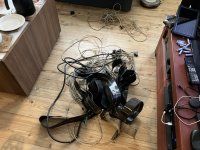
And a rats nest of cables that were inside the chassis for the other 15 terminals that were once connected, the printer and the tape drive.
Cables.jpg
 
Today, the new capacitors for the terminals power supply arrived and I wasted no time to get the old ones out and some fresh new ones in. Some of them were in quite horrible condintion...

Caps.jpg All in all, 4 of 10 were in bad shape, although not all as bad as that picture.

Recapped.jpg
Looks alright now, I just need to change the RIFA X class caps near the fuse... I ordered some KEMET X class caps but got RIFA Y2 class... Oh well, they don't look that bad, but I should change them out before they let the magic smoke out.

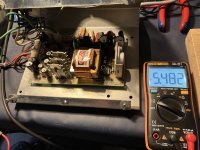
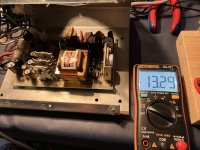
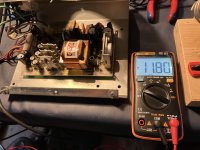
Speaking of smoke (kidding), the supply now runs pretty good. Got a nice +5 Volts and +12 Volts (little high, but there is no load yet) and a good -12 Volts.
+5V.jpg

+12V.jpg

-12V.jpg

The chassis got a good clean aswell, the chassis and the hard drive are now stored upstairs for the forseeable future while the back plane, card cage and the computers cards will stay near the bench. It all cleaned up really well.
The power supplies for the computer need some work though, the fuses were changed at one point from 2A and 3,2A to 25A (this looks like an emergency fix) and I noticed some very dodgy caps on the Memory PSU...
 
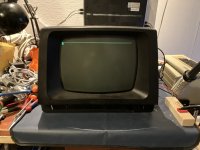
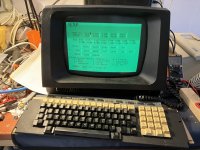
Got the terminal board back in the housing and tried a quick power test. No smoke... a beep, and another beep? And this image on the CRT.

CRTup.jpg

I can't really do anything from here, with the keyboard connected nothing happens on any keypress. The keyboard needs work though, as it's foam and foil keyswitches have yet to be replaced. I also don't know if this terminal needs a back up battery to opperate.

I did find the service manual on bitsavers for this terminal but have not yet had the time to really dive into it, but quickly skimming through some parts of it, I'm wondering if it needs a connection to the main computer for anything else to happen.

The second beep on start up has me wondering, as the manual says 1 beep means the processor is up and running and after 20 sec orso the cursor and command line should appear. Now, I get 2 beeps, cursor comes up but I'm not sure if the line up top is correct or if more should be there. The manual claimes some time of day clock should be there aswell, but... it also tells you to hook it up to a system first.
 
After a lot of musing on all sorts of problems that could be there to keep the keyboard from working (no -5V for some reason, no 5V to the keyboards, bad components due to battery leakage), none of those things were showing. The -5V was fine, the keyboard got powered... but the foam and foil switches were still waiting to be replaced.
What an anoying thing to do that was... but it's done.

refoiled.jpg

Powered up the terminal again and now the keyboard works and I can get into the Setup menu for the terminal. The image is fairly sharp and clear but shakes up and down a pixel orso. I have not done anything to the CRT board so there might still be a dodge cap there.

Setup.jpg
The good thing is... no burn in at all on the CRT, its image is fantastic apart from the slight jitter.

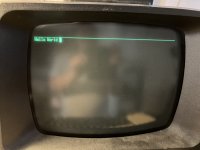
And most of the keys now work, there are a few that might need a little adjustment. But all in all, a good result.

HelloWorld.jpg
 
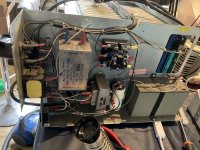
Now that the terminal is going and cleaned, I've started on the computer side. First up, the high voltage side of the power supply. Now, this might be normal in the USA, but I was a bit surprised by what I found behind cover...

HighVoltage.jpg

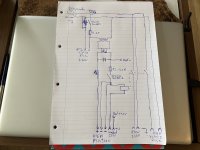
All the wires are the same 2 colours? How is that safe. I had to draw this out to make any sense of it.

HighV-schematic.jpg

So, Black is 230V AC hot. +25V DC, +12V DC and +6V DC. White is both 230V neutral and DC ground... all ziptied together.

The good thing is, it all seems to be in working order. I had no real way to test the contactor in there as the memory supply powers that. But otherwise everything seems in good condition.
Which means I should order some new caps for the memory and cpu supplies and get those going again.

And some new glass fuses, as the ones in there now are 25 Amps for both the Memory and CPU supplies and that is not correct...

Edit... and a new 12V battery, the sealed lead acid one in there now is cracked...
 
After reforming some of the capacitors on the 2 PSU boards and changing a couple of others out... it's time for a "smoke test". So I got the boards back into the card cage.
PSUboards.jpg
The Memory PSU (on the right) seems to work well. All voltages are there.

The CPU one though (on the left)... something is still wrong with that. 230V is going in and is getting rectified into high DC voltage on the 2 high voltage bulk capacitors. The 24V that also feeds the Memory PSU is also getting to the CPU PSU. But nothing seems to come out. And there is something I don't really understand. Although there is a +24V going to the CPU PSU... I can't seem to find a ground for it, not a direct one at least, the lowest resistance I could find is around 25 ohms.
And the same goes for a 6V line that runs from the CPU PSU to the distribution side (right next to the Memory PSU) to power a contactor that turns the fans on and powers the harddisk. The ground side of this does not seem to be connected back to the CPU PSU... the colour choice of the wires of the distribution side is not helping either. I feel like I'm missing something really obvious... I think I need to draw a new schematic with some of the PSU boards connections in it.

At least all the magic smoke stayed inside.
 
Back
Top