• Please review our updated Terms and Rules here

Keytronic Pad Materials

NeXT

Veteran Member
Joined
Oct 22, 2008
Messages
8,170
Location
Kamloops, BC, Canada
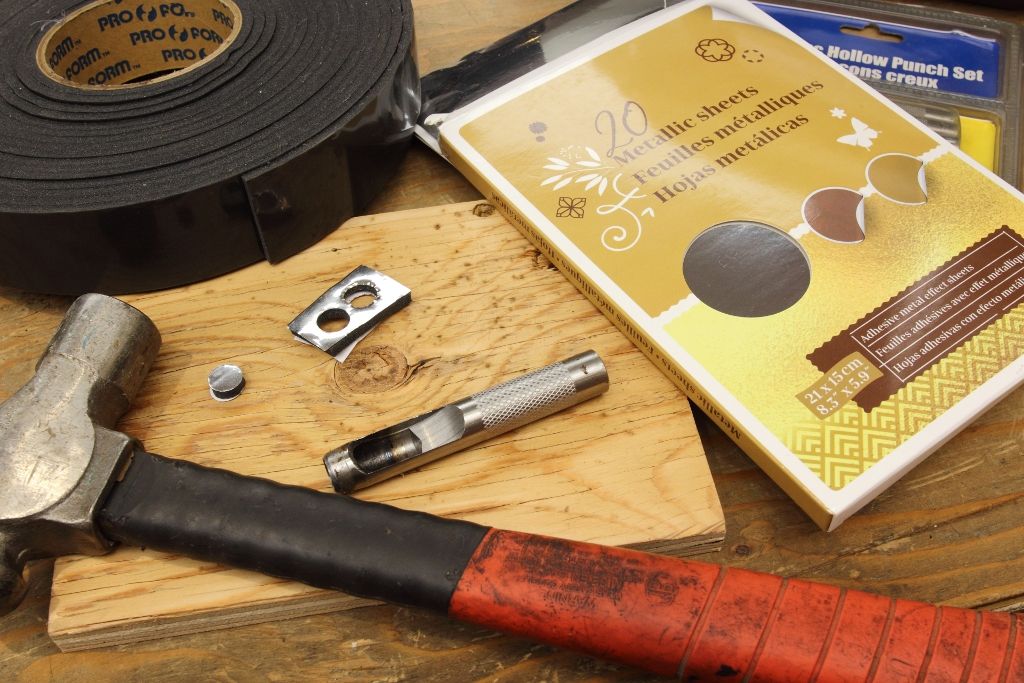
I'm now up to five machines and terminals that need all of their capacitive foam pads replaced. I am very much aware that TexElec sells new pad kits, however they are constantly on backorder for x number of weeks and after conversion and shipping it comes to about $50cad per kit which is fine if you are in a pinch and you only have one system to get going. Even if I opt for the alternate sellers on ebay I'm still looking at over $200 to rebuild all these keyboards. I can bring that cost down if I mass produce them here.
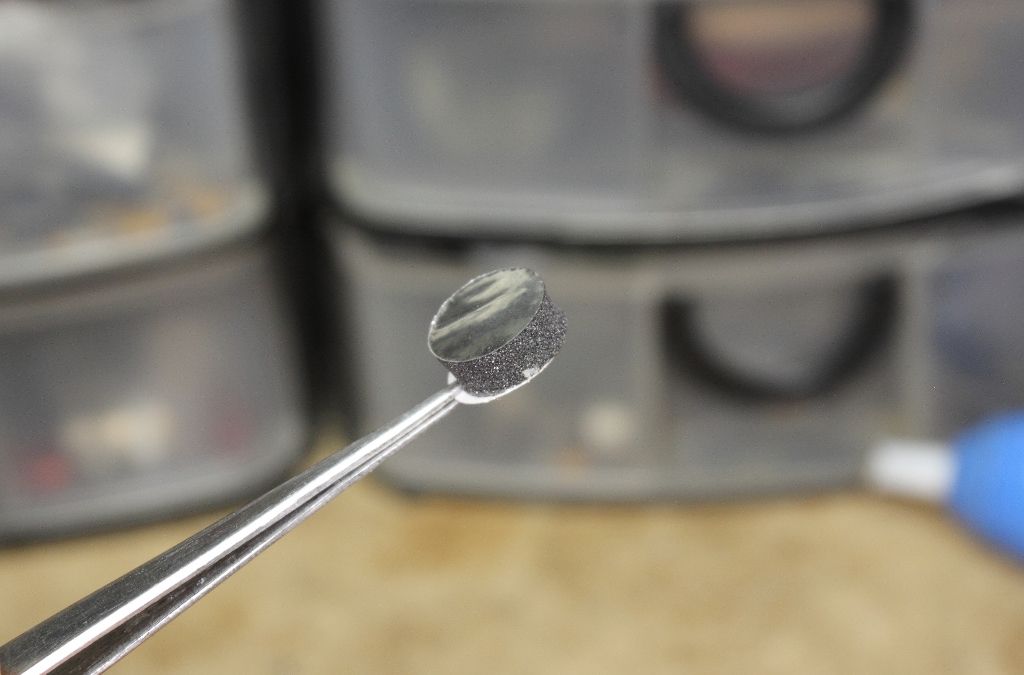
I've made my own pads before about ten years ago for my Lisa and they still perform great, but some of the materials are not as easy to source anymore (the aluminized mylar balloon from Dollarama was annoying to slice up because it liked to curl before it was glued down) or I didn't really specify the details on other parts. (2" adhesive-backed weatherstripping worked, but I didn't specify the brand, thickness or density)
I'll happily sit here for a weekend punching out 500 pads but if anyone has better suggestions for materials I can grab at The Home Depot I'd love to hear it.
 
last time I did it I used model railroad track bed and aluminized mylar from a craft store (Michaels)
if you followed the discussions when texelec was perfecting it, it is a PITA to find the exact foam
thickness and density to match. Most foam is too dense.
 
So I checked my stock and I still have the roll of foam I used to make the pads for the Lisa's keyboard. I've never had issues with it so there should not be any issues manufacturing more pads from it.
For the record, the foam I use is:
Pro Form Cat No. 25102; PICK UP TRUCK/CAMPER TAPE, adhesive backed, 3/16”x 1-1/2” x 30’ (5 mm x 38 mm x 9 m)
This is that I can tell still available from the manufacturer. It's about $25-$30 a roll

For the metalized mylar it's funny but Michael's had absolutely nothing similar in stock (I don't think I've ever gone in there and found what I needed in stock), so I wandered across the parking lot to Dollarama and in the craft section they had boxes of of "Adhesive Metal Effect sheets" (UPC 667888463978, product code 02-3098264) which is the same thing, but adhesive backed and in sheets, so no more spray adhesive. You can also reuse the waxed backing on the final product, so no more wax paper is needed either.

IMG_6694.JPG

IMG_6697.JPG


The first test punch was good. I'm not super uh...neurodiverse...about how a keyboard feels as long as the keys don't stick or have keybounce but it didn't immediately feel like I was pressing on something too spongy or dense. I'll prepare a test batch and grab a keyboard to load up.
 
Last edited:
if you followed the discussions when texelec was perfecting it, it is a PITA to find the exact foam
thickness and density to match. Most foam is too dense.
Is this something buried in Deskthority or Geekhack? I'm trying to find a thread or discussion or blog string from them somewhere else but Google's results are all pretty much poisoned with people plugging their product. It concerns me a little how few results are other people punching their own pads.
 
I've fabricated about a half-dozen sets of Keytronics pads for machines ranging from a Lisa 2/5 to a Corvus Concept. In my experience 3/16" foam is a wee bit too thin for some of them. TexElec apparantly ran into the same issue, as they replaced their original 3/16" white foam with a gray product that was around 1/4" thick. I built one set using the track bed foam and found it way too stiff - YMMV.

Knocking out 100-odd pads is a valuable right-of-passage for vintage hobbyists, but it gets old real quickly. I'll stick to TexElec going forward :)
 
I went with the "Alforementioned" rail track bed for one Lisa and then, for the other, 5mm? thick foam rubber from the bizarrely-specific and (for me) bizarrely-convenient Pentonville Foam and Rubber Products in relatively-central London. With many leftover square feet of material, I made more Keytronics pads for a Lisa keyboard at the Centre for Computing History in Cambridge. My Amazon-special hollow punches had extremely sharp edges along the slot, which saw me using up most of the plasters in the CCH's first-aid kit. I think the CCH still has my punches and they can keep them; I went ahead and let TexElec do the hard work the next time I had to deal with bad pads.
 
It concerns me a little how few results are other people punching their own pads.

It was on here and cctlk. There was a flurry of activity 5 years ago or so then the long texelec thread when they were ironing out the foam sourcing.
Applying 3M 777 adhesive, getting the foil flat, cleaning your hands afterwards, and salvaging the stiff plastic bottoms then punching
just isn't worth it. There is a reason they are constantly going out of stock. I don't know why they don't just bring up someone in China to fab them
other than getting cut out of the market eventually.
 
As a variation, I never kept the plastic disks from the old keys; I made a complete mylar/foam/plastic sheet sandwich and punched out entire pads from that. The plastic disks achieved this way didn't look as neat as the originals, but they worked for me. But it was still a drag to do, and I was really happy when I learned that I could buy new key pads instead.
 
last time I did it I used model railroad track bed and aluminized mylar from a craft store (Michaels)
if you followed the discussions when texelec was perfecting it, it is a PITA to find the exact foam
thickness and density to match. Most foam is too dense.
Agreed. Before the conversation some years back before Texelex got the bugs out I tried making my own. It was tremendous work and it turned out terrible.
HAve you reached out to Sarah or Kevin directly? They always seem to have some leftover.. I know they were sold out when I bought my last order and they still had something to sell me. Just worth a shot.
 
I should add that I followed Al's recommendation and used a disc cutter with shims to clear the plastic-foam-foil sandwhich. I had NO luck with the standalone punches. Tolerances on the cutter (from eBay) were abysmal and jams commonplace. After a while if I held my mouth just right when swinging the mallet I could kinda, sorta get consistent results. The adhesive makes a huge mess and smells awful. If you have a masochistic streak, give it a whack! For me it's not worth it.
 
I punched the foil/foam then carefully glued the old plastic disc to the bottom.
TexElec fabricated a punch. I don't think you can get a clean cut with anything less than a hefty arbor press and a very sharp cutter.
Hopefully what they built could punch more than one at a time.
It is very difficult to punch them so that the foil and disc are vertically aligned because the correct foam isn't very dense.
If you look closely, even some of theirs are cut on an angle.
 
As seen in the photo above I found that the direction which the foil is facing during the punching process does matter. Foil facing up and into the tool tends to pillow and cause a wrinkled cut. Having the foil face down into the wood block the punching force keeps the foil flat and straight-on hit with a sharp tool will cleanly punch through everything without distortion horizontally. Vertically though because you are compressing the foam while it is being punched you get a small amount of hourglassing which if you really cared affects the travel characteristics. I don't. :p

Another thing that I considered is that you assemble the sandwich and then cut them out using a laser. If that was the case you could in theory produce thousands of pads per hour once you get the output power and speed dialed in.
 
Last edited:
For reference, this is what I use and my method:
1. Frost King weather stripping (open foam) from Canadian tire. https://www.canadiantire.ca/en/pdp/...-x-1-4-in-x-17-ft-white-0640968p.0640968.html
2. 3/4" Silver mylar tape: https://www.ebay.com/itm/254635373409?var=554388932693
3. A green cutting mat from Dollarama.

The weather stripping is open cell foam which gives you more travel than closed cell foam so they are not stiff. Open cell was originally used. The cutting mat allows for clean cuts. Silver side up. No adhesive needed because the mylar tape sticks to the non-sticky side of the weather stripping but be warned that I use a dental pick to remove the white paper from the sticky side of the weather stripping. It's a PITA but once you get the hang of it, it's not bad.

I've tried all sorts of foam and this works best. Be sure 1/4" is good enough. It's actually a little taller than that spec and not all foam and foil pads are the same height. Dynalogic Hyperions are shorter than Apple Lisa's, for example.

Hope this helps,
Santo
 
Another thing that I considered is that you assemble the sandwich and then cut them out using a laser. If that was the case you could in theory produce thousands of pads per hour once you get the output power and speed dialed in.
I had this in mind as a fabrication method, but the local makerspace contemplated my sandwich of various plastics and invited me to imagine all the kinds of chlorinated chemicals that could emerge as byproducts of the process. The fact that one of the layers had a metallised mirror-like surface did not impress them very much either.
 
I had this in mind as a fabrication method, but the local makerspace contemplated my sandwich of various plastics and invited me to imagine all the kinds of chlorinated chemicals that could emerge as byproducts of the process. The fact that one of the layers had a metallised mirror-like surface did not impress them very much either.
A water jet cutter would be preferable over a laser. They can cut through many layers of soft deformable material without distortion or burned edges, such as in the mass production of shaped fabric pieces for clothing or card for gaskets. Also multiple layers of foam shoe insoles.
 
Last edited:
The last time I made these, I was using antistatic bags as the mylar layer. Unfortunately, I don't have any specific source for any of the materials. I was using weatherstripping foam tape from the hardware store, old antistatic bags, and some thin plastic that I'd acquired... somewhere. My process was to stick the foam tape to the plastic backing, spray 3M Super 77 spray adhesive on the antistatic bag material and stuck it to the top of the foam tape, and let it dry. The key was to let it dry thoroughly - if you punch it before it completely dries, it glues the edges of the foam together...

Punching was done with a manual hand punch made by a friend from a piece of sharpened tool steel with a hole in it, hitting it with a rubber mallet on top of a sheet of thick rubber as a backing. But it worked incredibly well, making the entire sandwich first, then punching. The result was some key foams that worked very reliably, if with a somewhat stiffer feel due to the different density foam I was using. But they worked quite well. I did a couple of Franklin Aces and a Compaq with these. I, too, have had issues with the TexElec pads. They've definitely gotten better over time, and the last set I had worked nearly 100% first go - as opposed to the previous sets which required a dozen iterations of taking the keyboard apart and replacing/messing with pads.

While it's nice being able to get the pads "off the shelf", the availability is a problem and the cost becomes prohibitive when you're talking about doing a whole bunch of keyboards. I have at *least* a dozen machines that need foams redone, and those are just ones I want to use/play with. The materials are pretty cheap, it's just a matter of developing a consistent method of creating them and a ready source of the materials. I had no real problems punching, but they do need to be punched squarely, any off center force results in crooked pads. It is tedious, but, I mean, having something to whack with a hammer during long annoying Zoom meetings is looking like a plus right about now.

I do intend to revisit my pad making for the same reasons NeXT is - can't easily buy the pads TexElec sells, and the cost adds up fast when you need tons of them. The current pads from TexElec do seem to be much much better than they were in the past, so that's a plus. But I need like 20 sets. But at $30 a set, and them not even being available anyway... might as well just make my own.
 
My initial test run has been pretty good however the following two batches I've been running into increasingly poorer yields due to the tool not cleanly punching through. This has resulted in about 75 good pads out of a batch of 91 (each foam strip does 26 pads, plus an additional 13 pads can usually be made out of a scrap end) which means it's currently about an 80% yield in each batch and each batch usually takes about 15-20 minutes to assemble and punch out.
Part of this has been the tool will eventually gum up with adhesive or the solid wood block (a 6x8) I use to punch with gets so riddled with circular tool marks that the surface is too rough to be working with (the blade can't squarely contact the material) and needs 1/8" cut off with the bandsaw. Using a green cutting mat found it too can't take prolonged abuse from a punch and hammer. I found working on a table also didn't help and resorted to sitting on a concrete floor with the block. I have not tried a bar of plastic, such as a cutting board. Another thing that has come to mind is a bench punch equipped with a 7/16" punch and die which will consistently provide a square and even punch along a 0-tolerance shearing edge however because of mentioned residual adhesives it will need to be regularly cleaned or else the tool will jam. MG Chemicals Adhesive Remover (Citrus) works well but it's expensive. Another option is a hammer die punch with 7/16" tooling.
 
Last edited:
Back
Top